Ever noticed how websites keep getting better and better? It's not just luck. A chunk of the magic involves AB testing. If you love designing websites, learning how AB tests work will benefit you in the long run. This article is the beginner's guide to AB testing Webflow for those passionate about web development.


A/B testing is comparing two or more website variations to see which one works best. It can also be applied to applications.
For starters, you need to have a clear picture of what you want to achieve. It can be more newsletter sign-ups or CTA clicks that boost sales. Then, you hypothesize, or in simple terms, guess what might work. It can be changing the color of your "Get started" button to grab more attention or adding a concise form.
Once you've got your plan, Webflow makes it easy to set up the test. You create different versions of your page or elements, like buttons or headlines, and Webflow takes care of the rest. It shows these versions to your visitors and keeps track of which one does better.
Ultimately, A/B testing in Webflow is like having your own science lab where you can experiment to make your website even better.

Clear test objectives in A/B tests act as the backbone of website improvements.
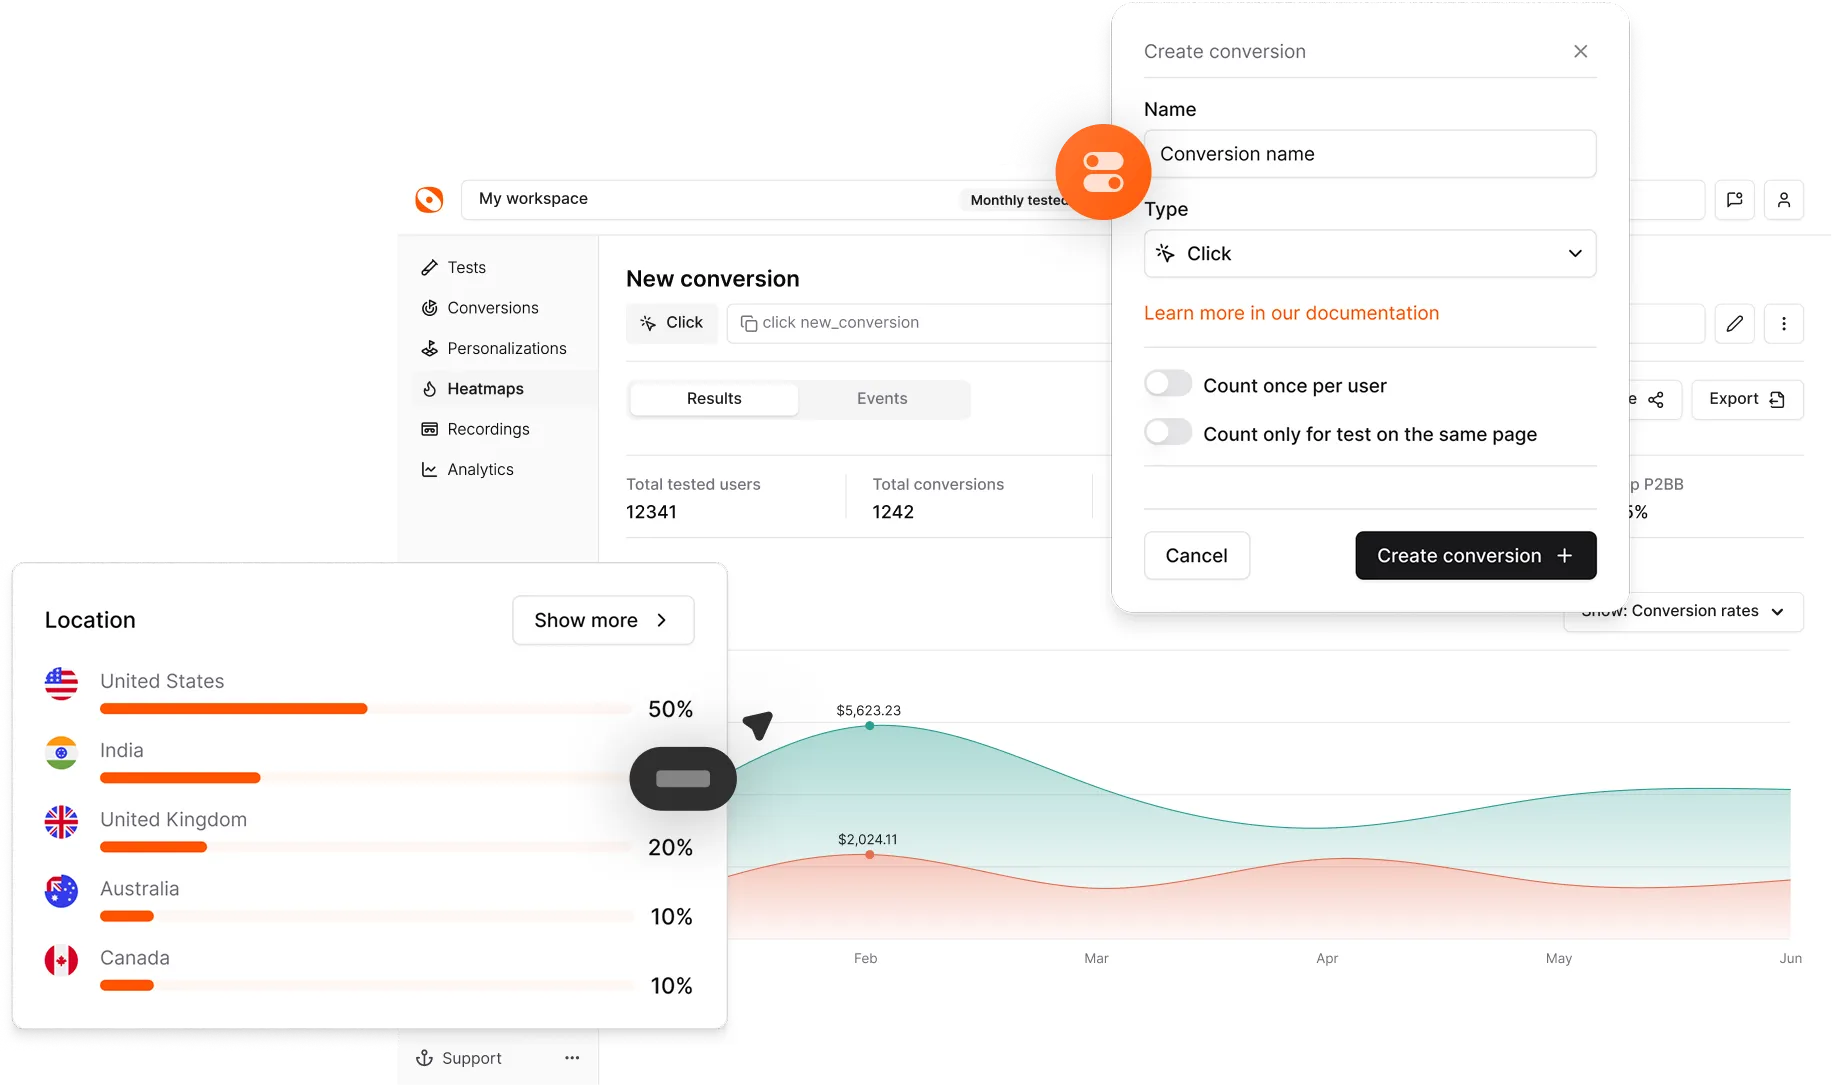
Brainstorming hypotheses is like making educated guesses about what changes might work, such as tweaking the color of your "Get started" button to boost clicks. Optibase is your go-to A/B testing platform that gives you your very own testing playground right within Webflow Designer. You can easily create different page versions to see what resonates best.
But don't overlook the details. Define your experiment parameters carefully – who sees what and for how long. Once everything's set up, implement those test variants. Let Webflow weave its magic, showing different versions to your visitors and collecting data on which one performs better.
Implementing variants in Webflow for A/B testing is super simple. Let's see how:
That's it! You're all set to optimize your site with A/B testing in Webflow. Easy as pie!
Once you've finalized your A/B tests in Webflow, it's time to hit that launch button! Here are a few steps you need to take:
Add A/B testing code: Insert your A/B testing script in each variant's settings.
Publish: Hit publish to make your changes live.
Monitor performance: Track how each variant performs using your A/B testing tool's dashboard.
Analyze and choose: Based on the results, select the winning variant.
Make the necessary changes: Make the winning variant permanent.
Once you've crunched the numbers from your A/B tests and uncovered the winning variants, it's time to use the test outcomes and optimize your website for conversions.
First off, take those insights and apply them like a pro. Whether it's making adjustments to the layout, tweaking the color scheme, or refining your CTA buttons, every little change counts.
Keep the momentum going by implementing those winning variants across your site. Let them take center stage and work their magic on every page. But the journey doesn't end here.
Keep iterating, keep experimenting. Test new ideas, refine your approach, and always strive for improvement. With each iteration, you're one step closer to website perfection – and higher conversions to boot.
So there you have it – a step-by-step guide to mastering A/B testing Webflow. But before you rush off to implement those strategies, let's talk about Optibase.
This A/B testing platform takes the crown for maximizing web development potential. It's the ultimate tool for streamlining every part of A/B tests, making it a breeze to set up experiments and dissect results.
Plus, its intuitive interface and seamless integration with Webflow mean you'll optimize your website like a seasoned pro in record time.
How do I access A/B testing features within the Webflow platform?
To access A/B testing Webflow features within, navigate to the Webflow dashboard and find Optibase in Webflow Apps. Install the app, connect the Optibase API key to Webflow, and follow the first-time setup instructions by embedding the code script in the header. Once set up, you can start A/B testing directly within Webflow Designer.
How long does it take to set up and run an A/B test in Webflow?
With Optibase's native integration, setting up and running A/B tests in Webflow takes just a few clicks. Typically, tests should run for at least 2 weeks to gather sufficient data, with a minimum of 500 site visitors for accurate results.
What metrics should I track when analyzing A/B test results in Webflow?
When analyzing A/B testing Webflow results, track key metrics like conversion rate, click-through rate, and statistical significance. Optibase provides a feature called P2BB (Probability 2 Be Best), which calculates and identifies the winning variant. It's recommended to wait for a 95% confidence level for accurate results.